Tuesday, January 26, 2010

Wallum Vessels- deeper water

"It took me four years to paint like Raphael, but a lifetime to paint like a child. "
Pablo Picasso
The "vessel" is a form of enormous significance in ceramics. What distinguishes a vessel is its ability to contain something. These vessels are embryonic, they are carriers for an idea about the wallum. Prototypes, fragile, ugly, often contain a germ of an idea that continues, untouched through the creative process.

Picasso said we should all learn to draw like children, by this he meant let go of learned, technical skill and capture the joy of sensation, colour, form and wild imagination. It is really hard to do, I take refuge in skill, feeling that if something doesn't quite capture the fleeting, glimpse I had in the original inspiration then at least it will be beautiful because of the skill. I keep letting go "just a little bit" - which is an oxymoron. I have to trust that these funny little vessels will be able to carry me beyond the safety of technical skill and into the wild blue sea.

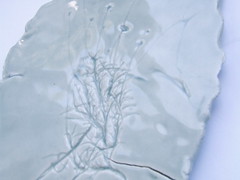
wallum "hatpins" impression

This is the first wallum work out of the kiln. This works directly from wallum impressions- in this case of a small plant called "Hatpins" and a tiny banksia with roots. I pressed the plant directly into the clay and fired it , the plant matter was burnt off in the firing. The glaze is an oxidized celadon.

I've always loved those old- fashioned museums where there are row upon row of pressed, dried and stuffed specimens. Collecting wallum impressions makes me think of those enormous, dusty collections. The thing that galvanised the Victorians to create such collections was curiosity. The collection was just a representation of the unknowable mystery and greatness of the world. I think that's what I like most about this crazy collecting. Instead of illuminating the world and making everything clear, a collection of dried flowers or stuffed birds illuminates the mystery in human beings as well as the mystery in Nature.


Monday, January 18, 2010

Wallum Kit


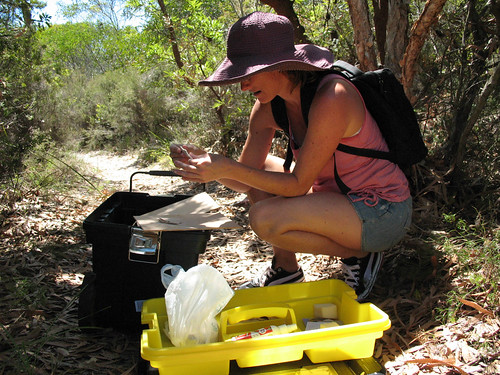
Currimundi, originally uploaded by rebeccathewrecker.

This is a photo of what Rebecca and I get up to when we enter the wallum. What you can see here is our "Wallum Kit" contained in it's super- duper heavy duty 4WD toolbox.

This contains a couple of reference books on the wallum, some plastic containers for holding our "impressions" and samples, a lump of porcelain, two containers with "silpression" (a two- pack jewellery moulding silicon rubber), brushes, video and normal cameras, and water.
"Silpression" impression from the wallum.

We've been gradually refining the data we need for our collaborative and individual pieces. I've been collecting impressions of the wallum in porcelain and silpression. In the studio I've been experimenting applying these to porcelain- thrown objects and flat discs. Applying texture to thrown objects is tricky. For years I've been refining shapes and surfaces that strongly refer to the perfect circle created by the wheel. Applying texture to porcelain warps it out of shape, even if you straighten it up to round again the clay has a memory that comes out in the firing.

Currumundi was the first big outing for the Wallum Kit and it worked great.....but I have to say that dragging it up another really steep sandhill when we thought it was just a short walk to the beach was hard work.

positive and negative impressions

Thursday, January 7, 2010

Etch

Pouched Coral fern, bracken, club moss.

We pulled over to the side of the road near Broken Head to get these photos for etching. I discovered later that week the price to pay as baby ticks had by then burrowed deep into my person!

Once I stopped itching, the images were 'thresholded' and 'inverted' in photoshop reducing them to strong black and white tones only which a choice of positive or negative.
Then they were photocopied on to Press n Peel computer circuit board paper. An iron at high heat transferred them onto my super clean (scotchbrite, detergent ammonia, meths) copper and silver sheet (0.5- 0.7mm). This can be tricky as I am no good at ironing and the images sometimes only partially transfer. I think the humidity also has a negative impact. Some I patched up with paint pen circuit board marker. Others I re-did.

Then I prepared a nitric acid etch bath in pyrex dish. Very carefully. With gloves. Actually I had some I'd already mixed which can be used again and again. I was intending to use ferric chloride and ferric nitrate but discovered that I'd left some of the equipment at college. You need more stuff for the safer chems. It was good in the end as nitric is super fast although incredibly evil and I had previously thought it did not work as well with the press n peel. But it does.

The pieces were immersed for up to 20mins. I watched carefully through my safety goggles and tried not to breathe in the vicinity. Doing yoga in an adjacent room proved misguided as traces of fumes wafted my way making me wonder what the hell was happening in the acid bath instead of being calmly aware of the present moment.

The bubbles forming on the surface of the metal were brushed gently with a sulphur crested cockatoo feather. I couldn't help thinking that Phillip Adams would have approved as he refers to the white birds as "rats of the air". Poor cockatoos. I apologised to the feather (one of the only soft things that won't dissolve in nitric) and got on with the job. The bath accelerated and at the end I contemplated dilution as one piece of copper was fairly frothing and spongy slag forming so quickly that it was dislodging the resist. Enough!

Then the pieces were neutralised in soda and cleaned with scotch brite and fine brass brush. I patinated them with some Jax blackener. It does not really work well on copper but when I woke up this morning I found that verdigris had grown in the coral fern etch overnight! Magical chemicals!

I'm not sure how I will use them but made a funny little brooch using a silver coral fern positive etch and impressing vinyl onto a negative bracken fern etch. The copper one that got out of control in the bath and etched at various depth as the resist was dislodged created an interesting 3d surface. I was thinking of convergent evolutions (coral/coral fern) and fossils.

I like the etching method and also making impressions from etching as unlike the other methods we have tried with silicone and wax and clay, it allows me to reduce the scale. I am doing more experiments with the etchign and will try to multilayer it, like the multilayers of the wallum.